

Home > Tutorials > How to create and assign Icon to Folder
How to create and assign Icon to Folder
In this manual:
- What is Skinned Folder?
- Selecting Skinned Folder mode
- Creating icon for folder
- Binding icon to folder
- Restoring folder's original icon
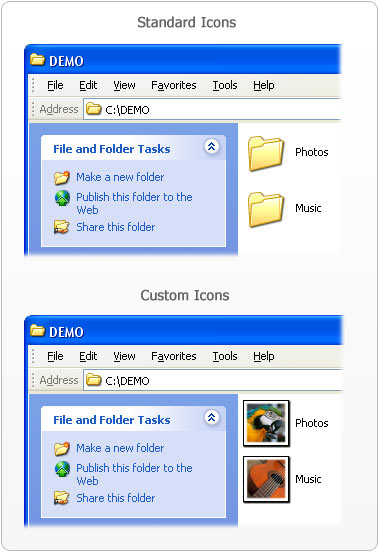
What is Skinned Folder?
The Windows family of operating systems has a great feature that allows you to beautify the appearance of folders displayed in Windows Explorer.
You can set your own icons for all folders, except for virtual system folders like My Computer, Desktop, My Network Places, etc.
This feature does not only make your experience brighter – it also speeds up your work, for you can customize your most frequently used folders the way that they stand out against a background of numerous other icons.
Here are a few samples of how it may look on your computer:
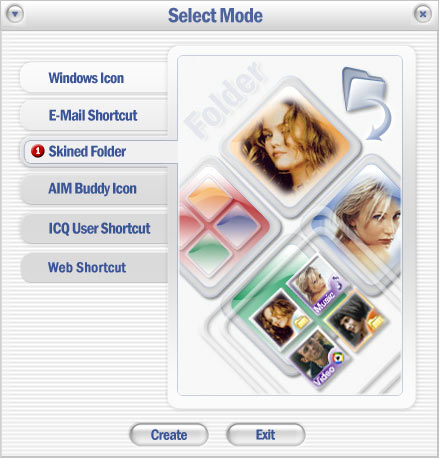
Selecting Skinned Folder mode
Icon Constructor offers a great number of ways to
create and use icons. Since we are going to create a folder icon, we
will need to select the Skinned Folder (![]() )
mode in the Select Mode dialog on startup.
)
mode in the Select Mode dialog on startup.
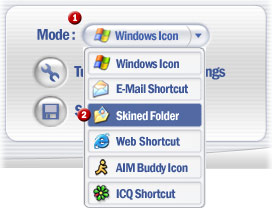
Besides using the startup dialog, you can also switch
mode in the program's main dialog. For that purpose, use the Mode drop-down list in the bottom-right corner of the main window. Clicking
on the drop-down list will open the menu with all available modes. To
create a folder icon and apply it to a folder select the Skinned Folder (![]() )
item on the menu:
)
item on the menu:

Creating icon for folder
Icon constructor allows converting both photographs and images with transparent areas to icons. Before applying a new icon to folder, we will need to set the appearance of the icon. The icon creation and customization technique has been covered in these articles:
How to create Icon with transparent background
Following these directions, you will need to create and customize your icon and then continue to the next step.
Binding icon to folder
Now, when we have configured our icon, we will need to attach it to folder. Here is how we are going to do that:
1) Click on the Mode(![]() ) drop-down menu in the bottom-right corner of the window and then
select Skinned Folder(
) drop-down menu in the bottom-right corner of the window and then
select Skinned Folder(![]() ) on the list that appears.
) on the list that appears.
2) Once the mode is selected, click on
the Assign Icon to Folder(![]() )
button.
)
button.
![]()
3) In the Browse for Folder window that appears, select the folder, which you want to change icon for.

4) If you want to see the results of
your manipulations at once, select the Show Saved Icon(![]() )
checkbox in the bottom-left corner of the dialog.
)
checkbox in the bottom-left corner of the dialog.
5) Now click OK(![]() )
to finish the creation of the icon.
)
to finish the creation of the icon.
Restoring folder's original icon
Perhaps, at some point you will need to restore a default icon for
some folder that you have customized with IconConstructor. If that
happens, you will just need to run the Restore Folder Icons(![]() ) utility, which you can easily find among IconConstructor's icons.
) utility, which you can easily find among IconConstructor's icons.
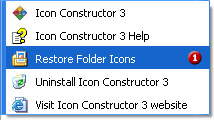
To restore icons, run that utility.
In the window that appears, you will see the list of folders with icons that you have changed using Icon Constructor.
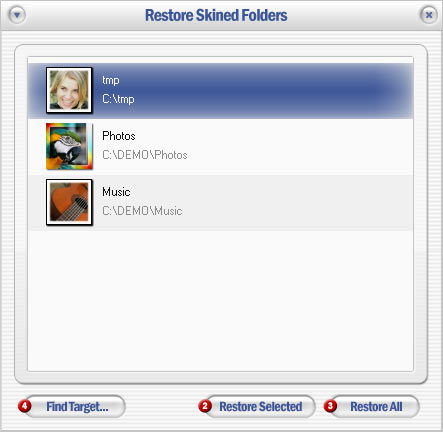
To restore some folder's icon to default, select the folder and then
click on the Restore Selected(![]() )
button. If you want to restore icons for all folders, click on the Restore All(
)
button. If you want to restore icons for all folders, click on the Restore All(![]() )
button. You can also use the Find Target(
)
button. You can also use the Find Target(![]() )
command, which will display the location of the selected folder.
)
command, which will display the location of the selected folder.